For those of you who are getting Cloudflare for their universal or flexible SSL service, one of the biggest issues is simply to get it to work. In this complete how-to set flexible SSL guide for WordPress, we will go through every part of the setup, including the problems that you can run into. We will start by going through why you might need to use flexible, when you should use flexible SSL, and the problems that can cause the flexible SSL not to work for your WordPress.
Table of Content
Table of Contents
Introduction
WordPresscheat.com is powered by Cloudflare’s flexible SSL service and as you can see, everything is working correctly.
This complete WordPress Flexible SSL walkthrough for Cloudflare will help you do the following:
1. Changing WordPress to serve over HTTPS (SSL) through Cloudflare without error.
2. How to fix the infinite redirect loop.
3. How to enable sitemap’s function to serve sitemap with HTTPS address using flexible SSL.
4. Some starter webmaster tips for HTTPS migration.
This WordPress plus Cloudflare Flexible SSL guide assumes the following:
1. You have a working configuration that uses Cloudflare’s nameserver DNS service. It is a requirement to get flexible SSL to work for WordPress.
2. You do not have an SSL certificate for your own server. If you do, you should use the Full SSL feature instead of flexible. However, we will not go through the Full SSL set up in this guide.
Why You Should Use Flexible or Universal SSL
If you have an informational site and simply want to encrypt the traffic for your visitor, you should setup for HTTPS for your sites. Sometimes, getting an SSL certificate can be costly and inconvenient. Cloudflare’s flexible SSL service encrypts the traffic from your visitors to the Cloudflare server. This means that the encryption is usually sufficient for an information site.
However, this setup is not that great for eCommerce sites or sites that handle sensitive information. The information between the Cloudflare server and your origin server is not encrypted.
The second main reason is cost and ease of setup. It is much cheaper to setup a simple flexible SSL on Cloudflare’s end than to figure out SSL migration for your own site.
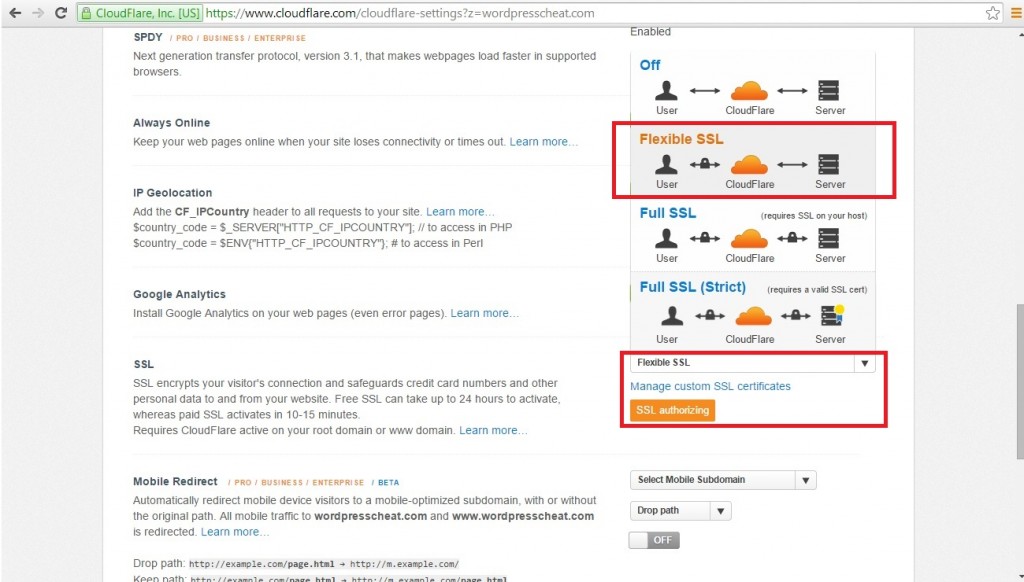
Turn on Flexible SSL from Cloudflare’s Setting Screen
Without further waiting, we will start with the actual guide of teaching you how to set up flexible SSL on your WordPress flawlessly and easily. Again, we assume that you already have a working Cloudflare + WordPress configuration where your website is served through them with the DNS change.
If you just signed up for Cloudflare’s service, check first to see if Flexible SSL is actually enabled on their end. After you change the SSL setting, wait for the confirmation saying that SSL is active. In our experience, the waiting time for flexible SSL can take from 12 hours to 30+ hours.
One good way to tell is to access your website via the HTTPS address after a certain time. For example, instead of the usual https://wordpresscheat.com. Try to type in https://wordpresscheat.com. If the flexible is working, your website should load. If it’s not active yet, you will see errors with screens like the following:
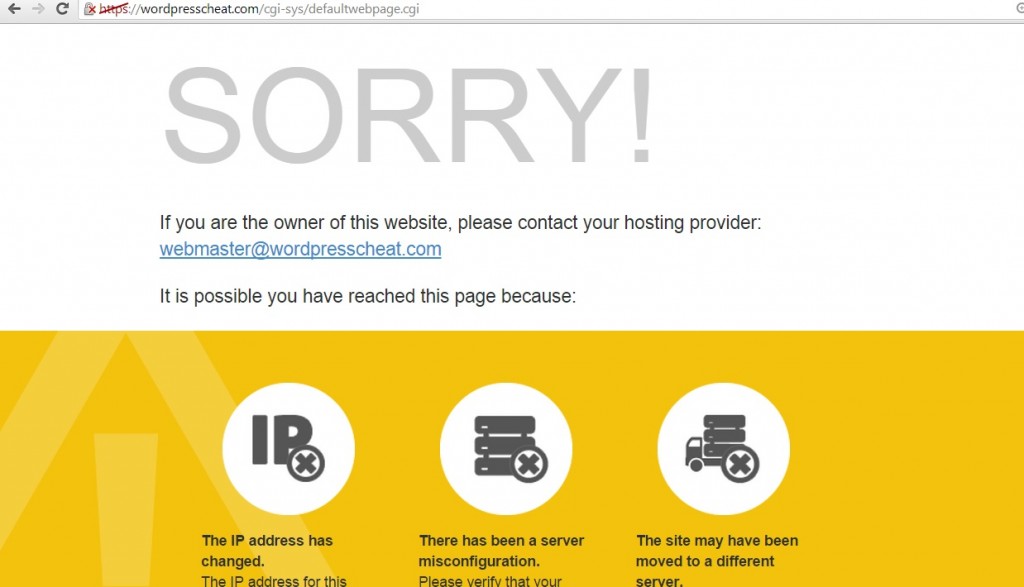
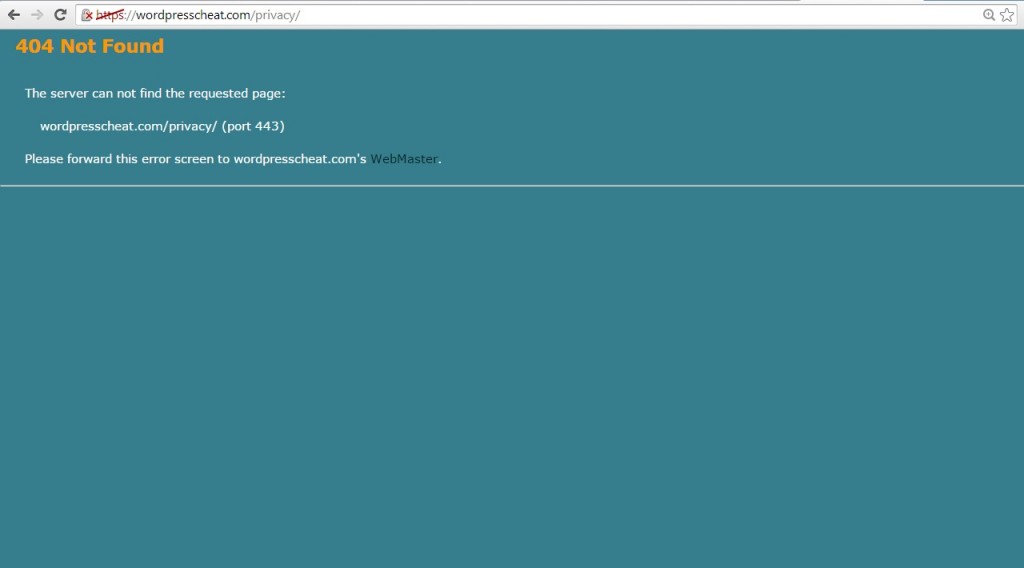
Note that even though you can load your webpage via HTTPS, your website will look “OFF”. This is because your site’s resources are still being loaded from HTTP, and that can cause errors. Continue the guide to finish your WordPress flexible SSL setup.
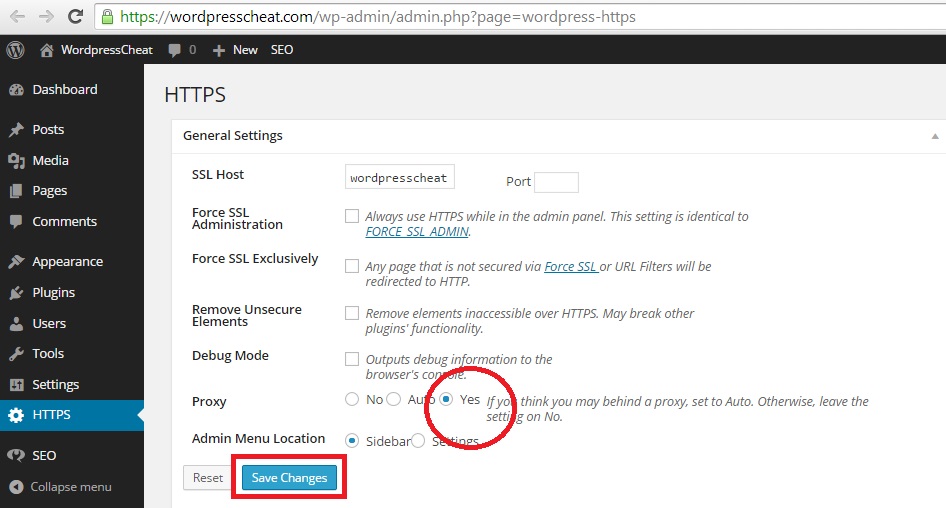
Installing HTTPS (SSL) WordPress Plugin
Next, you will need to install a WordPress plugin called WordPress HTTPS (SSL). The point of this plugin is that it can rename all of your CSS, javascript, and image resources with HTTPS. After setting the proxy option, your HTTPS WordPress site should load naturally.
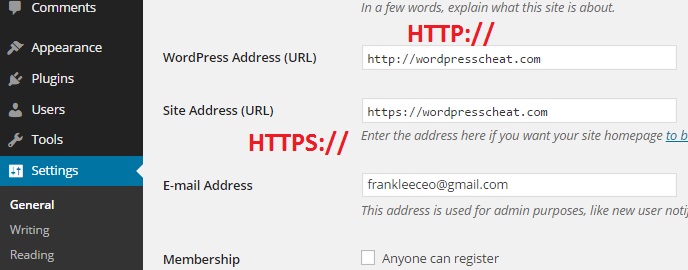
Change your WordPress website’s HTTP address to HTTPS
It does not matter where you read it, it is never a good idea to change your WordPress website address without knowing what you are doing. Do NOT change your WordPress’s address and site address directly. The only reason that you are using Cloudflare’s Flexible SSL feature is that you do not have a natural SSL certificate. Without proper server settings, changing the HTTP to HTTPS will break your site immediately! And if you do have an existing SSL certificate, there is no reason for you to use this flexible SSL guide as you should be setting up for WordPress Full SSL option.
Changing the first entry will cause your site to be down completely. Changing the second entry will cause your main page to have an infinite loop where you need another plugin to fix. However, you will need to change the second entry, we will fix the redirect loop error later.
The reason why you need to do this, is so that your WordPress sitemap plugin can function correctly with the HTTPS SSL addresses. Without changing this setting, your sitemap plugin will either show a blank, or with incorrect HTTP addresses.
Installing CloudFlare Flexible SSL WordPress Plugin
After you changed the setting and try to load your site. You will see this error: This webpage has a redirect loop. To fix this problem, install a WordPress plugin called CloudFlare Flexible SSL. After installing, you should find your pages loading correctly without the WordPress redirect loop error.
If your HTTPS (SSL) Cloudflare and WordPress setup still does not load correctly at this point, or if it only works some of the time, your cache program installed on your WordPress site may be the culprit.
Existing WordPress Cache Issues
Some cache plug-ins can run into issues through the process of caching both the HTML and website resources. This can confuse Cloudflare into loading incorrect pages with incorrect resource file SSL address. When we tested it, we had issues with W3 Total Cache. After a few trials and errors we went with WP Super Cache and that solved the problem.
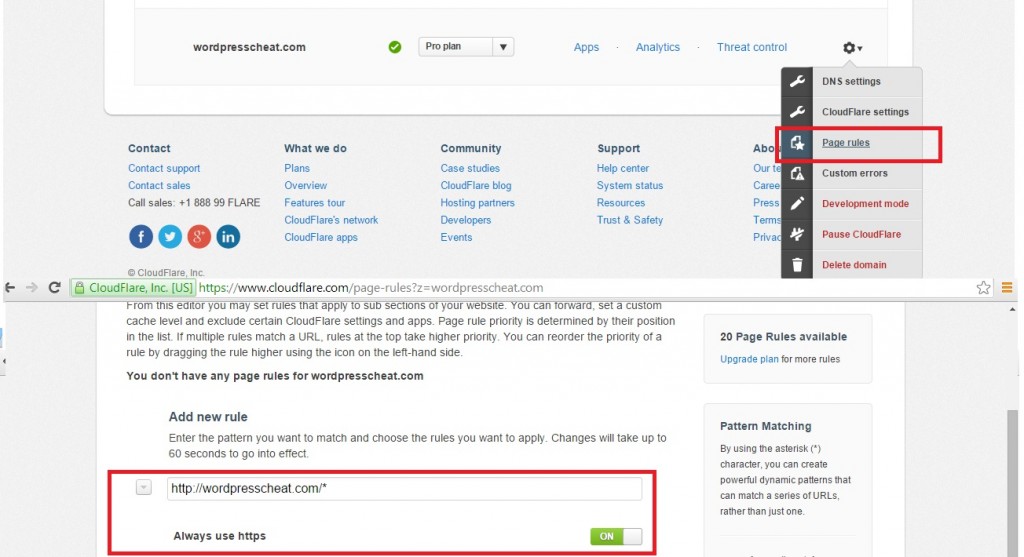
Changing HTTP to HTTPS redirect rule via Cloudflare
Before you start this step, visit your pages and make sure that everything is loading correctly. Remember to use anonymous login such as Google’s incognito to make sure that you see what your visitor sees.
Your next step is to visit Cloudflare again to add more direct rules. Although the site address change can already do the trick. You want to ensure the Cloudflare follows through with the redirect rules on their side as well.
Visit cloudflare, check the page rule tab under the website. Type in https://wordpresscheat.com/* (use your own site). And change the option to Always use https.
Starter WordPress HTTPS SEO considerations
Lastly, there are a couple more things to do to finalize your WordPress HTTP to HTTPS migration using Cloudflare Flexible SSL.
WordPress HTTP to HTTPS Canonical Setup
The canonical setting tells Google or other search engines that you want them to index certain versions of your website. Although after setting the site address it should already have the correct canonical setting. Double-check your source code to make sure that the canonical is displayed correctly for your WordPress site.
If not, you can update it using WordPress SEO by Yoast under Permalinks > Canonical Settings. Change the drop-down box to show Force HTTPS.
Setting Up Google Webmaster Tool for HTTPS
If you already have an HTTP site registered with the Google Webmaster tool, you will need to register your HTTPS as well at this point. Google at this point treats HTTP and HTTPS as two different websites. For example, https://wordpresscheat.com is different from https://wordpresscheat.com in Google’s eyes.
After registering, check the sitemap that your WordPress plugin has generated. Make sure that the new version under HTTPS has the correct URL’s using your HTTPS address. Submit the new site map to make sure that Google can index those new HTTPS pages over time.
The sitemap software that we used for our site is WordPress SEO by Yoast.
Lastly, just as a safety measure, use Fetch as Google tool to check a few of your pages. Make sure again that the WordPress pages are loading correctly over Cloudflare flexible SSL.
Change Your Internal WordPress Links to HTTPS
Now, although you already have the redirect rules set up so that all of your HTTP pages can automatically change to HTTPS. It is a good idea to manual go through your pages, and change all the internal links so that they point to HTTPS directly.
After all these steps, you should now have your WordPress site served over Cloudflare flexible SSL without actually having SSL. All of your pages should have the green-certified lock mark instead of orange, and your SEO for the HTTPS switch should be decent to start with. Good luck and let’s encrypt!
Thanks for this. Once i installed the Cloudflare Flexible SSL plugin my site crashed. But i deleted the plugin and it’s working so far.
I have apply cloudflare flexible ssl to my site.
But now my site rank in google search result is disappear.
How to fix this?
Thanks
On my other blog, I just setup SSL using Flexible SSL from CLoudflare and it is work flawless.
Thank you for your sharing.
Cloudflare showing SSL is active.
But when i try to visit HTTPS version of my site it is redirected to error pages. How much time i have to wait ?
wow thanks.. my wordpress alreay https with your tutorial.. thank brother
thanks nice post information..
nice tutorial…
regards
sutopo
Hi Friend, my website error after using cloudflare, search console sitemap http error 403, why problem this